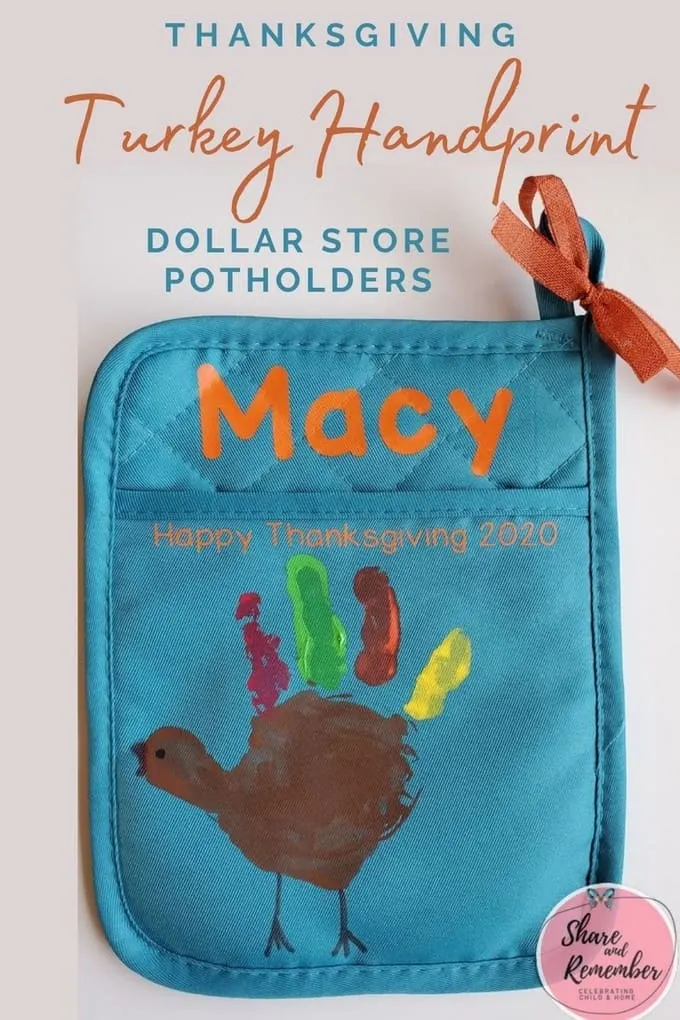
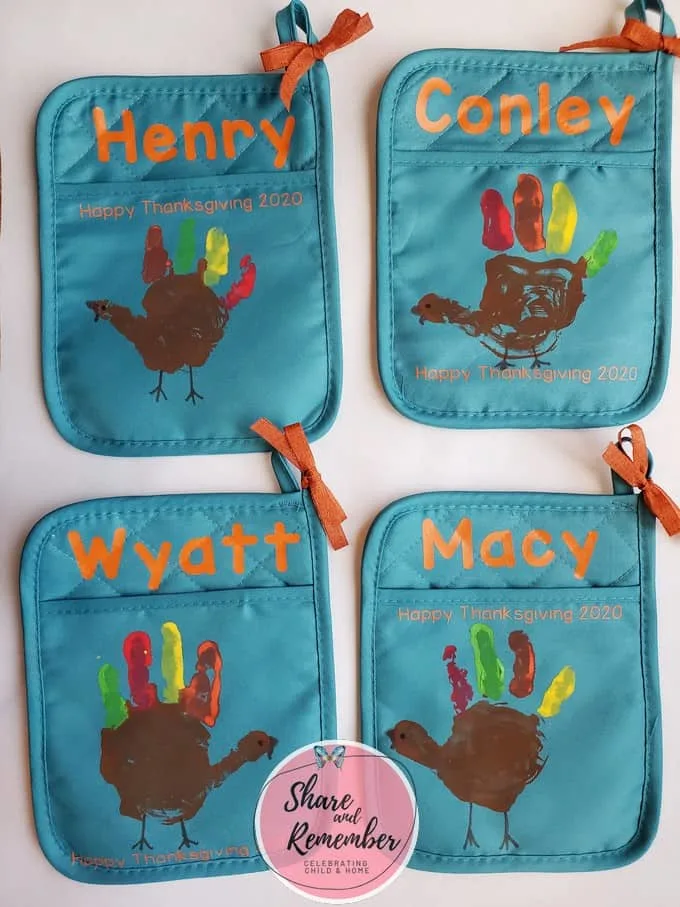
We’re feeling in the Thanksgiving spirit now that we’ve made some DIY Turkey Handprint Potholders! It’s one of my favorite traditions with young children. Parents can pull out this turkey handprint potholder each year and remember that 2020 wasn’t all bad.
Thanksgiving is a time for creating cherished memories with family, especially with young children. I love the delightful tradition of the handprint turkey. Whether it’s a card or my DIY Turkey Handprint Potholders, it’s a sure sign Thanksgiving is here!
Why Choose Turkey Handprint Potholders for Thanksgiving?
A Unique Family Tradition
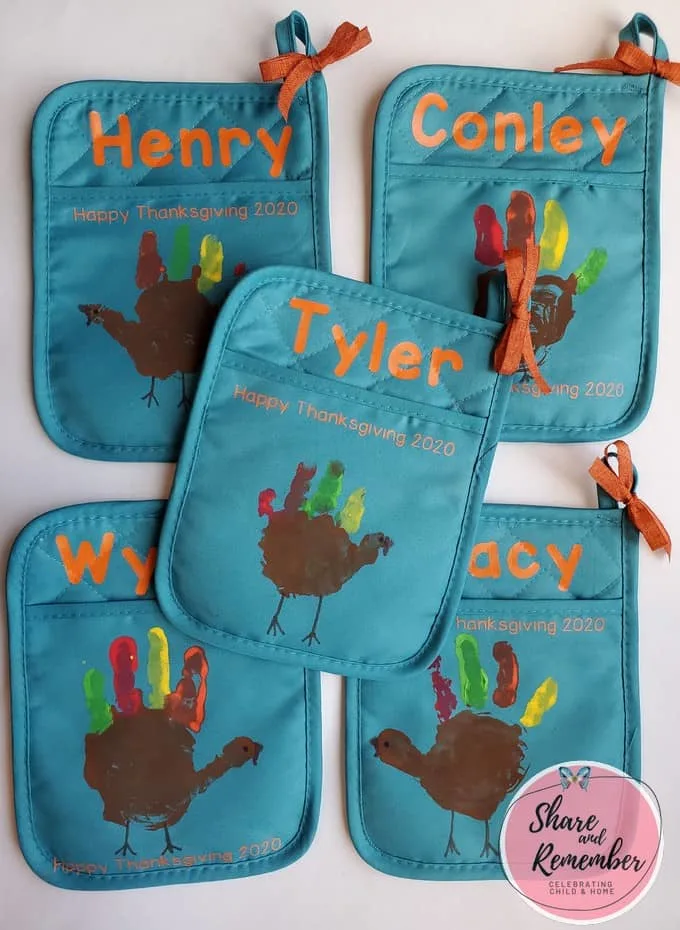
Making DIY Turkey Handprint Potholders is more than just a seasonal activity; it’s a meaningful tradition that captures the essence of Thanksgiving. Each year, as you and your children create these personalized potholders, you preserve memories highlighting resilience and gratitude, especially reflecting on challenging times like 2020.
Practical and Decorative
These potholders are beautiful additions to your kitchen decor and useful. Even though I used a pot holder from Dollar Tree, it’s inexpensive and made from durable materials.
Step-by-Step Guide to Making Turkey Handprint Potholders
Materials You’ll Need
- Fabric Potholders: Choose a color that complements your kitchen decor. Silicone-backed potholders are highly recommended for their durability and heat resistance.
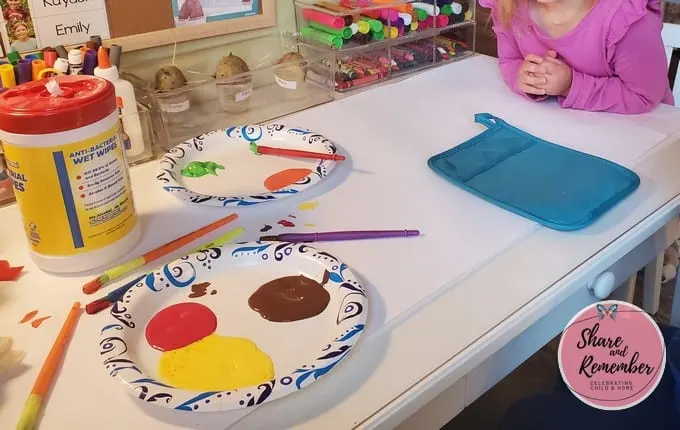
- Acrylic or Fabric Paints: Vibrant colors make your turkey designs stand out.
- Sharpie Markers: Ideal for adding fine details like eyes and beaks.
- Cricut Maker and Easy Press Mini (optional): Perfect for adding personalized iron-on words or details.
- Ribbon: Adds a festive finishing touch for gift giving.
- Paper Towels and Hand Wipes: Essential for cleaning up spills and excess paint while you’re working.
The potholders we used are from the Dollar Tree. They are silicone (or similar) on the back, very nice for $1.00!
Types of Paint to Use
I used acrylic paints because that’s what I had on hand. Fabric paints would also be a good choice and create more vibrant colors.
Instructions
1. Preparing the Workspace
Set up a clean, flat surface with paper towels to protect your workspace. Place all materials are within easy reach to streamline the crafting process.
2. Painting the Handprint
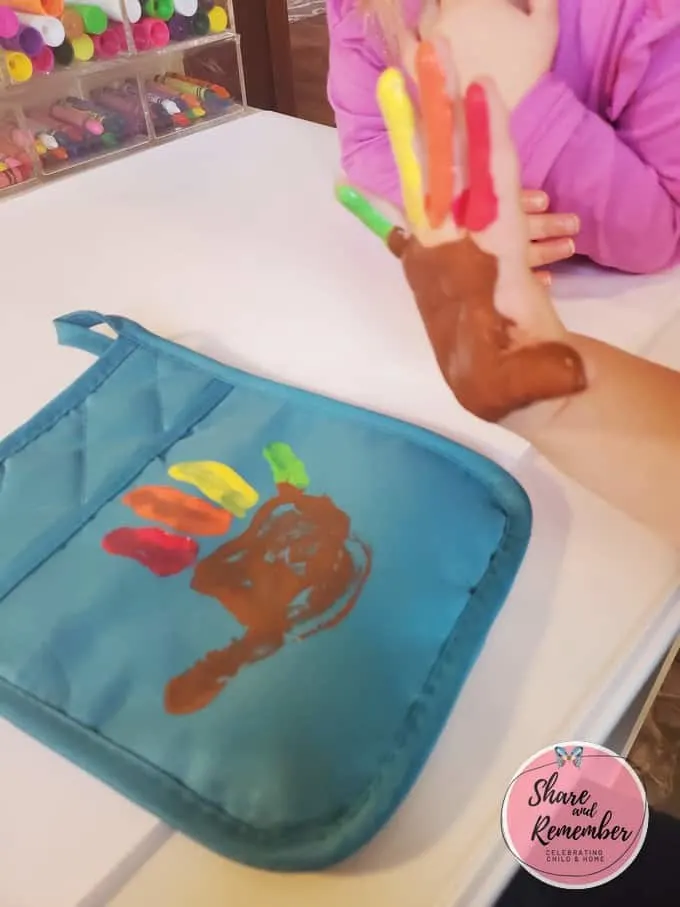
- Demonstrate the Hand Position: Show your child how to spread their fingers to make a clear handprint. Encourage them to keep their hand open to capture the turkey’s body and head.
- Apply Paint: Press your child’s painted hand gently onto the potholder canvas. Guide their hand to ensure the print is clear and well-defined.
- Add Feathers: As you paint, narrate the process by identifying different parts of the turkey, such as the body, head, and individual feathers. This makes the activity engaging and educational.
3. Adding Details
Once the handprints are dry, use Sharpie markers to draw additional features:
- Eyes and Beak: Add the eyes and beak details with Sharpies to bring the turkey to life.
- Legs and Waddle: Finish the design by adding legs and a waddle for a complete turkey look.
4. Personalizing with Iron-On Words
Using a Cricut Maker, cut out personalized phrases or your child’s name in fun fonts. Apply these iron-ons with an Easy Press Mini for a professional finish. You can also write the child’s name with a Sharpie or fabric marker.
5. Finishing Touches
I tied on an orange burlap ribbon just for fun. The parents loved them! Tie a ribbon around the potholder for a festive look for gift-giving without wrapping.
Tips for Making Turkey Handprints
- This can be tricky with younger ones because they want to close their hand. I demonstrate how to hold their hand open with fingers spread. You might need to remind.
- Keep paper towels nearby in case you need to start over. Even with older children, I help them because you really don’t want to have to remake your canvas…
- As I paint their hands, I say, “Here is the turkey’s body, this is the turkey’s head…let’s paint this feather blue, this feather yellow…”
- Guide the child’s hand to make the print and lift it off quickly so they don’t smear it.
- Keep paper towel or hand wipes near by to wipe the excess paint off the hand or for a quick clean up if paint gets spilled.
Additional Crafting Tools
Cricut Maker and Easy Press Mini
Investing in a Cricut Maker and Easy Press Mini can elevate your crafts by allowing precise cutting and professional-quality iron-ons. These tools are perfect for adding personalized touches to your Turkey Handprint Potholders. I prefer the look of personalizing with vinyl so it doesn’t feature my handwriting.
Sharpie Markers
Sharpie markers are ideal for adding fine details that stand out. They are quick-drying and provide crisp lines, making it easy to add the turkey details like the legs, beak and waddle. Using a Sharpie was faster than using paint, but not as colorful as paint would have been.
Creative Variations of Turkey Handprint Crafts
Since we make turkey handprints every Thanksgiving, I like to switch it up and make something unique each time. Here are some we’ve made in the past:
- Cutest Handprint Turkey in the Land
- Thanksgiving Handprint Turkey Placemat
- Hand Print Turkey Keepsakes (very popular!)
- Turkey at the Gate Popsicle Stick Hanger
- Turkey Wood Clip Frame
- Handprint Calendar
Additional Resources
- 42 Fun and Easy Thanksgiving Crafts for Kids – Discover more creative projects to enjoy with your children this holiday season.
- Top Materials for DIY Kitchen Crafts – Learn about the best materials to use for durable and attractive kitchen crafts.
- How to Use a Cricut Maker for Beginners – A comprehensive guide to getting started with your Cricut Maker for all your crafting needs.
Happy Thanksgiving and Happy Crafting!
