These beautiful paper roses can be used for wedding decorations, parties, attached to gifts or for Valentine’s Day. They look a little tricky at first, but after you make one or two, you will be well on your way to making a vase full of beautiful paper roses!

[xyz-ihs snippet=”Thank-you-for-reading-“]


Beautiful Paper Roses Tutorial
Supplies Needed:
- Colored craft paper
- Pencil
- Scissors
- Craft glue
- Template


Directions: Lots of pictures are included. You may find it more helpful to look at the pictures than follow the written directions the first time around, especially if you’re a visual learner like me!
Cut 4 pieces of the same colored craft paper into a square. All 4 cutouts should be the same size. In the tutorial, the papers are cut to 4 x 4 inches. On one of the square papers, trace the 6 petal pattern with a pencil using the template.

 Cut out the traced pattern. Repeat to cut 3 more flowers.


Cut Flower Templates
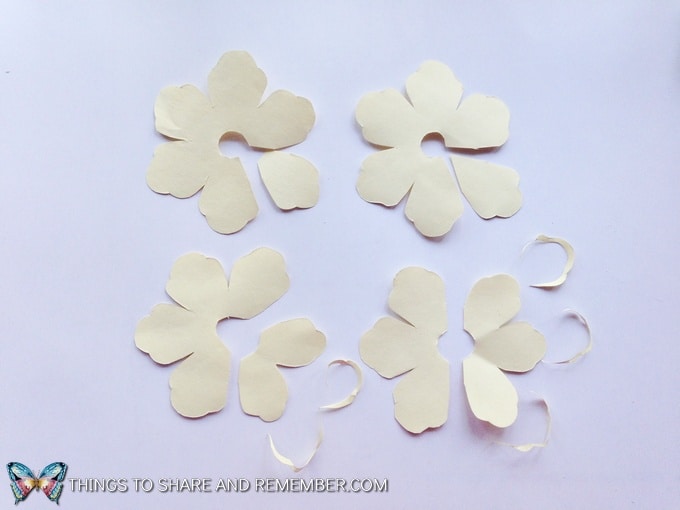
Cut the 6 petal pieces into 2 parts but each piece should be cut differently. Then cut out 1 petal from any two of the 6 petal pieces. Next cut out 2 petals from the third pattern and cut the last pattern into half (3 and 3). So, now let’s check, we have 5-1, 5-1, 4-2 and 3-3 petal patterns.


Next, cut the edges of a 2 petal pattern and any one of the 3 petal patterns slightly from their outer edges to make them a bit smaller.

Give the Petals Dimension
Use a small round object (wood skewer) to create curves on the sides of the cut-out petal patterns. Try to keep the curves neat.


Next, glue the sides of all the patterns and give them a 3-dimensional look! Apply glue on one edge of the petal patterns and join it with the other side. Join the sides of each pattern one by one.


Now we have – 2 pieces with 5 petals, 1 with 4 petals, 2 with 3 petals, 1 with 2 petals and 2 with 1 petal. Check and make sure they’re all there!


Assemble the Paper Rose
Start to connect the flower shapes by gluing one on the top of another one. Arrange them nice and neat to create a beautiful, blooming pattern. The ones with more petals should be on the bottom and the ones with fewer petals should be on the top. Follow this from the bottom: 5-5-4-3-3 small-2-1-1.


Finishing up now – once all pieces are glued together, allow time for them to dry. Cut green leaves from green colored craft paper and glue them with the flower.


Grab all the colors you have and get crazy crafty!

