We are well into our January dinosaur theme from Experience Preschool It’s been so fun learning about paleontology! Investigating the science of rocks and fossils, creating an excavation dig and making fossils. Using a dinosaur fossil clay recipe, we mixed up some dough that dries well and looks like a fossil!

Dinosaur Fossil Clay Recipe
The Dinosaur Fossil Clay Recipe uses simple ingredients:
- 1 cup of coffee grounds (used grounds work well – I used several used K-cups)
- 1/2 cup of cold coffee
- 1 cup of flour
- 1/2 cup of salt
Mix the ingredients ahead of time or invite children to help. Roll out a ball of dough. Press a small object into the dough. Bake the fossils at 200 degrees for 30 minutes.


They took turns stirring the mixture.

I love that this little guy is “helping” his friend mix by holding his arm. So much to be learned through hands-on activities!

Our dinosaur fossil clay recipe is coming together!

Everyone was interested in helping. Can we eat it? It’s safe to eat but it won’t taste good!


Playing with Dinosaur Fossil Clay
Try this awesome STEAM science and nature idea: Fossil Press. Try various objects to test pressing them into the dough and seeing the impressions. 

First, we played with the dough like play dough. The dinosaur fossil clay recipe has a rough, gritty texture. It’s different than we usually play with!

After exploring and experimenting with the dough for a while, we rolled our dough into balls. Then flattened with our hands, pushing down to make a flat surface for our fossils.


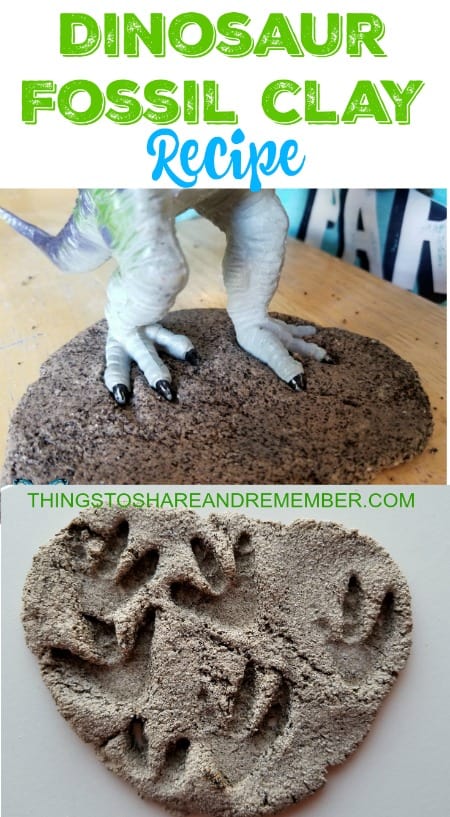
Using our dinosaur figures, we pushed the dinosaurs feet, tails or heads into the dinosaur fossil clay.


It was fun to see what kinds of imprints they made.

Some were not quite ready to make fossils. Instead, they played with the dinosaurs and dough.


Feeding the dinosaur!


Eventually, everyone made fossils.


This T-Rex’s feet were awesome for making fossil prints.


The whole time we worked with the dough and dinosaurs, the children were developing hand strength.
Baking Dinosaur Fossil Clay Recipe
After making imprints in the dough, we carefully moved the fossils to a pan.


After baking them at 200° for 30 minutes (or longer), they were done! The completed fossils are quite durable. Not too crumbly. I put them in baggies for them to take home.


When we looked at the completed fossils, we could find the dinosaur and match up the footprints or part of the dinosaur that we used to make the prints. The dough did not shrink up.


Try this amazing dinosaur fossil clay recipe! You won’t be disappointed.

Can you guess what dinosaur made these prints?


What was this dinosaur doing? Walking around in the mud? Eating off a plant? 

Can you see the footprints? The neck of the dinosaur? What about the tail?

This STEAM play idea allowed the children to test out their ideas and repeat actions through free-play.


More Dinosaur Dig Fun
- What’s in the Box? Dinosaur Dig
- Jurassic Tree Snack
- Digging Dinosaur Dig!
- Dinosaurs |Meaghan’s Creative Kids Preschool
- Ready for Dinosaurs | CHAOS on the Creek


Facebook | Instagram | Pinterest
I received curriculum from Experience Early Learning for honest and authentic stories resulting from my daily experiences using the curriculum. As a user of Experience Preschool for many years, I am pleased to share quality educational experiences. #sponsored #ExperienceEarlyLearning
Simone
Friday 26th of May 2023
How many balls can be made with one recipe?
ttsar
Wednesday 31st of May 2023
I'm unsure, it's been a while since I made it, but I believe there was enough for my group - around 6.