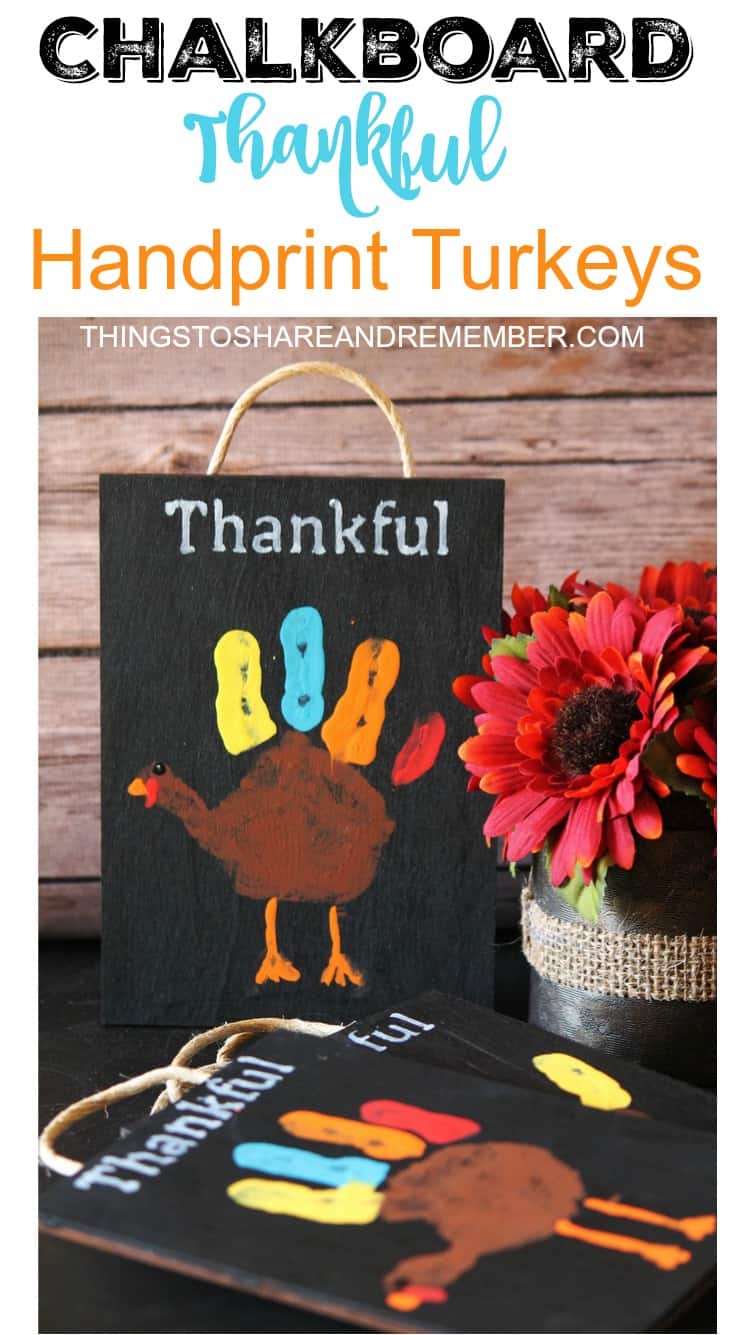
Create a meaningful and creative Thanksgiving craft with your kids this year! These Chalkboard Thankful Handprint Turkeys are adorable keepsakes that are easy to make and perfect for family gifts. Follow this step-by-step guide to make your own.
Every year, we make handprint turkeys, but I like to switch it up and make a unique version each time, like this recycled + burlap keepsake or 2015’s Turkey at the Gate version. This year’s chalkboard thankful handprint turkeys turned out extra cute!

Materials Needed for Chalkboard Thankful Handprint Turkeys


Essential Supplies
- Chalkboard paint
- 5×7 craft board (e.g., ArtMinds Medium Laser Shape from Michael’s)
- Foam brush
- Acrylic paints in assorted colors
- Paintbrushes
- Paper plate
Additional Items
- Twine or yarn
- Hot glue gun and glue sticks
- Stencil (optional, can be made with a Circut machine)
- Sharpie white paint pen
Step-by-Step Directions for Chalkboard Thankful Handprint Turkeys
1: Prepare the Chalkboard Base
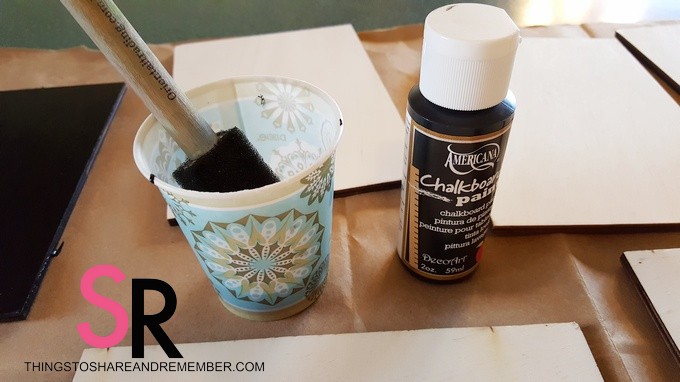
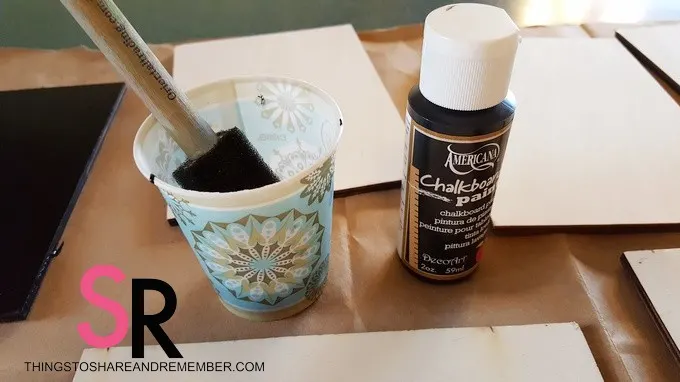
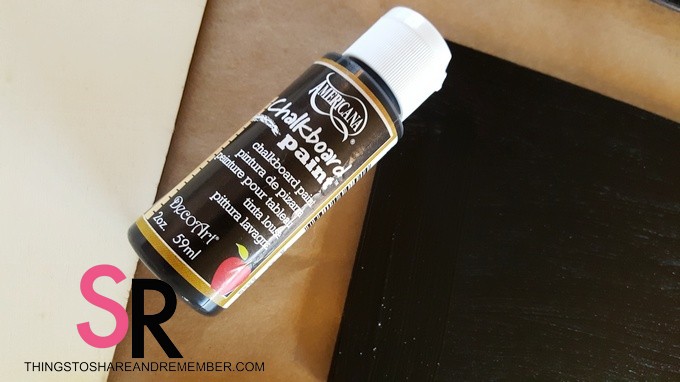
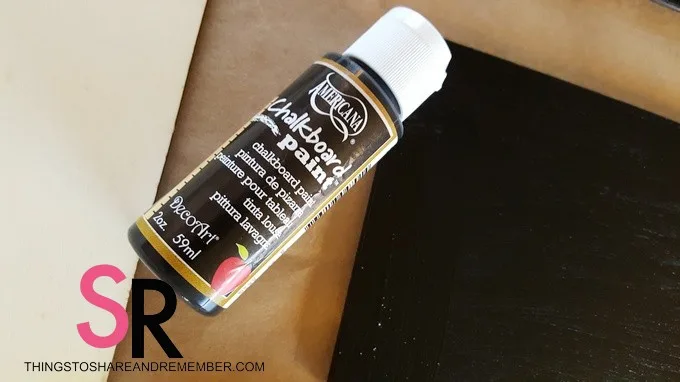
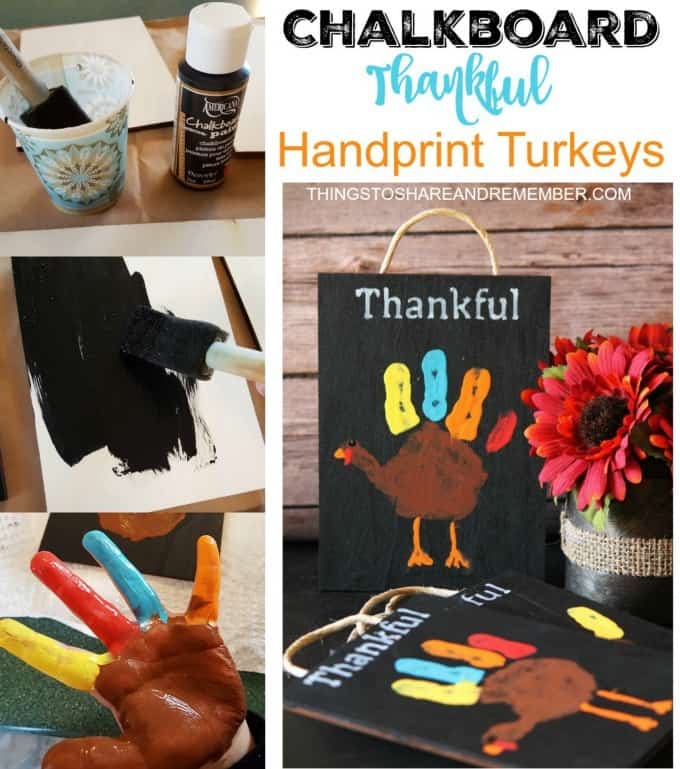
I used Americana Chalkboard paint. A little goes a long ways so just get a small bottle. This one looks like it’s 2 oz. I used a foam brush to paint the boards. If you squirt a little paint in a paper cup, clean up is super easy.
- Use a foam brush to paint the craft board with chalkboard paint.
- Allow the paint to dry completely before proceeding.
- Apply a second coat if needed for full coverage.

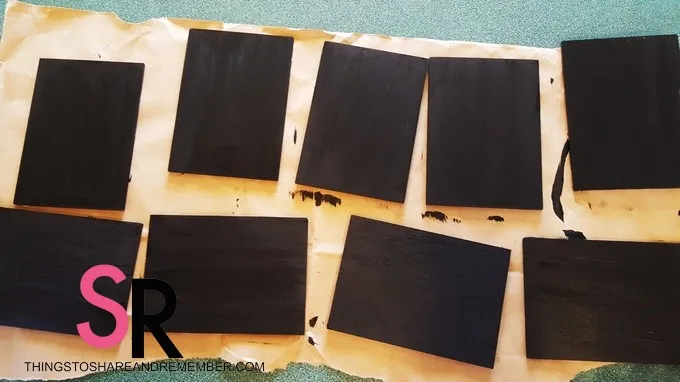
I wasn’t too particular about painting the boards. Just make sure the whole surface is covered. I like the brush marks to go all the same direction. You may wish to apply some paint to the edges for a more finished look.
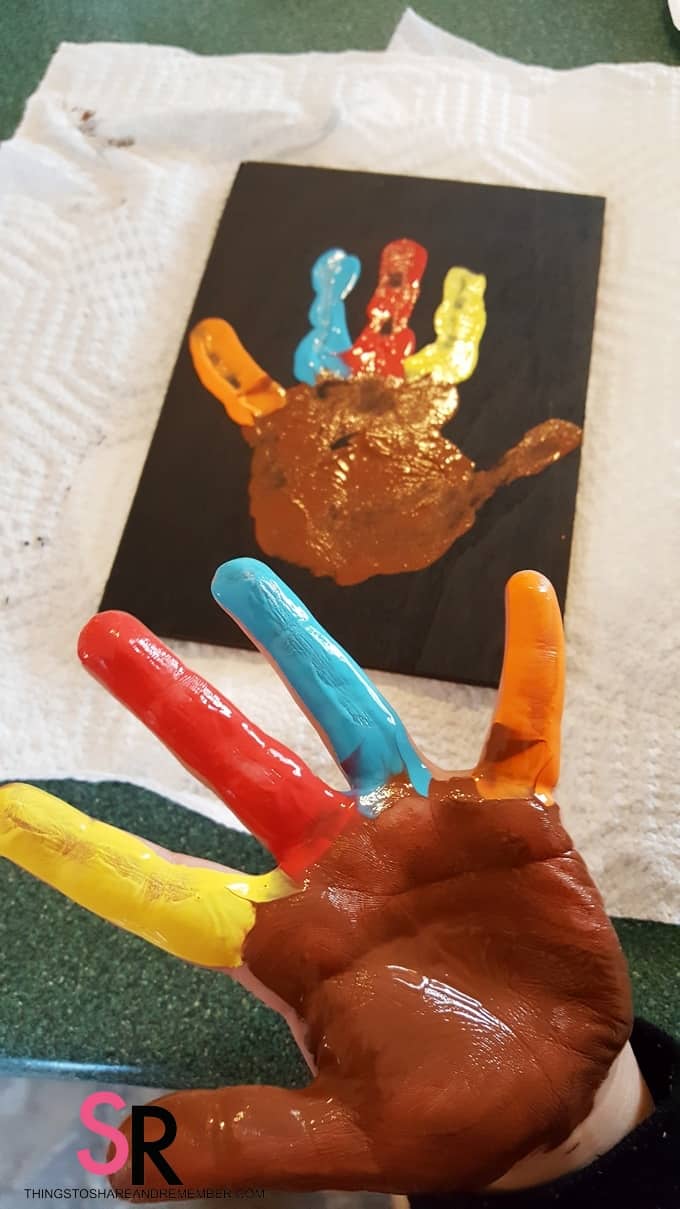
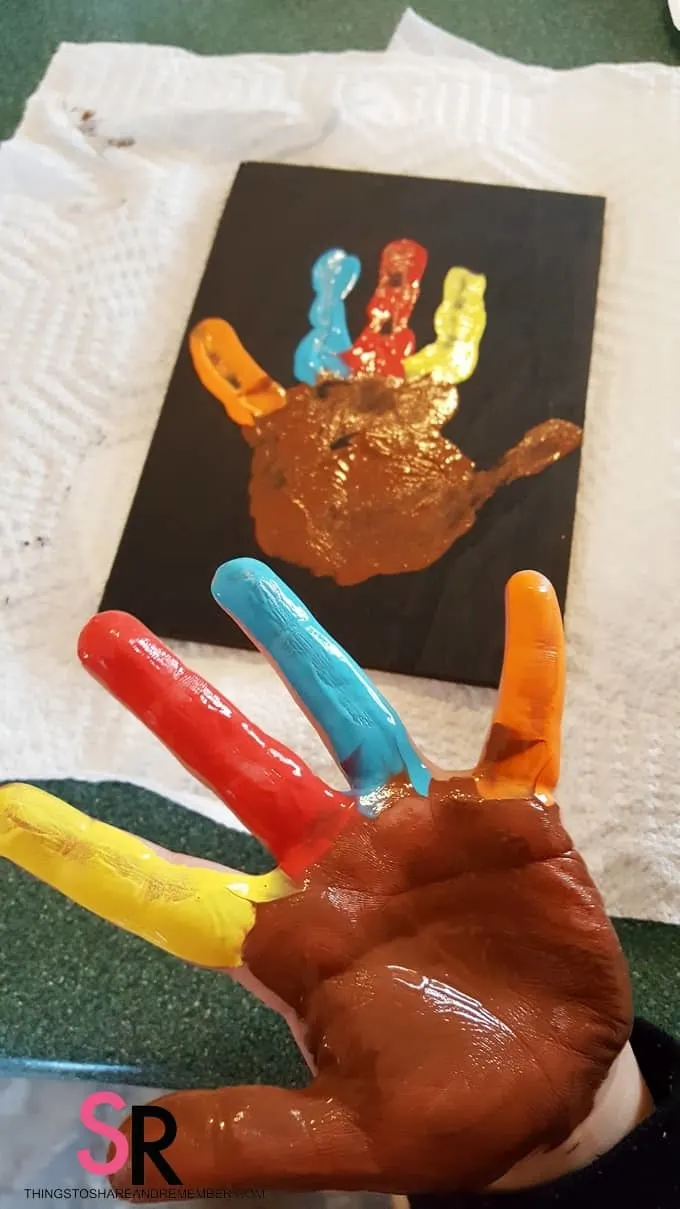
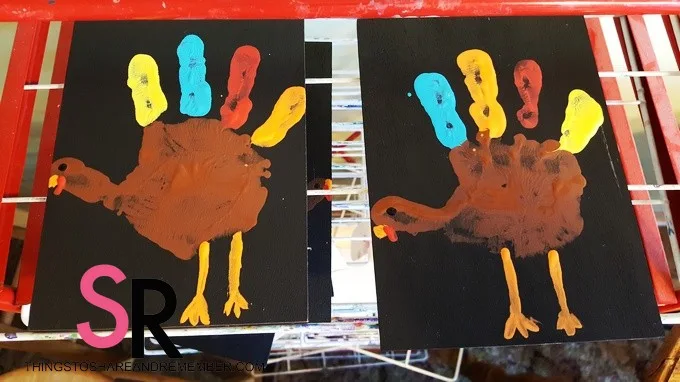
2: Create the Handprint Turkey
- Pour a small amount of acrylic paint onto a paper plate.
- Paint the child’s hand with different colors using separate brushes. Start with brown for the palm and thumb (the turkey’s body) and choose other colors for feathers.
- Press the painted hand onto the craft board, ensuring a clear imprint.
3: Add Details and Personalization
- Once the handprint dries, use a small paintbrush to add details like the turkey’s beak, wattle, and legs.
- Use a stencil or handwrite the word “thankful” with a Sharpie white paint pen or small brush.

After the handprints dry, use a small brush to add details on the face and the legs. This goes very quickly and don’t worry, they all turn out cute – the shapes for the beak, wattle, and legs don’t have to be perfect – it’s very forgiving!
4: Add a Hanger and Final Touches
- Hot glue a small length of twine or yarn to the back of the board to create a hanger.
- Write the child’s name and the year on the back to make it a memorable keepsake.
Next, I added a “thankful” stencil. I created the stencil on my Cricut machine. You could hand write it as well.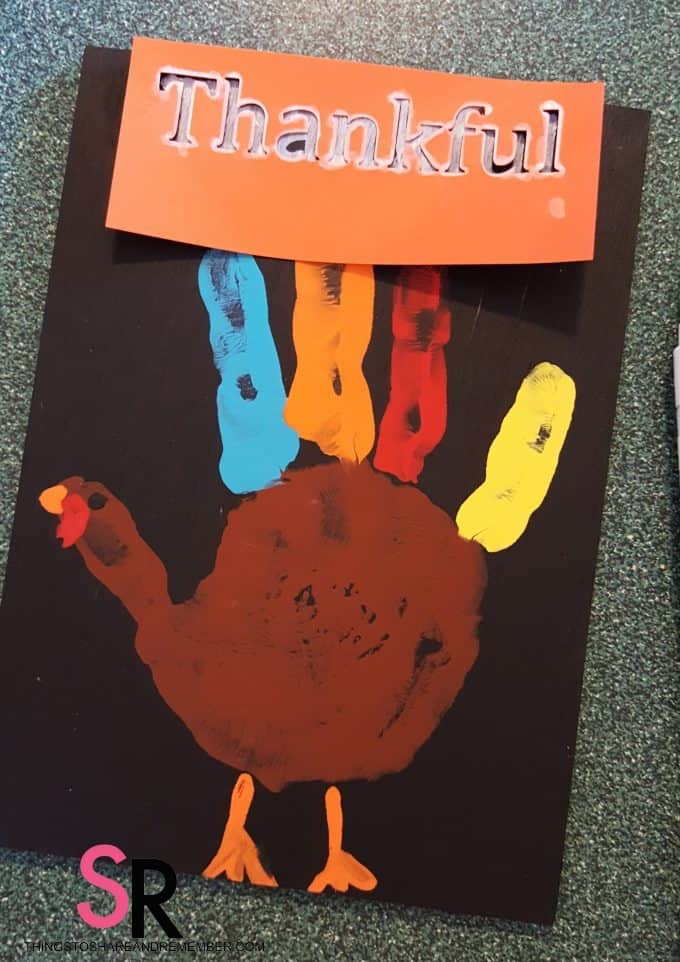

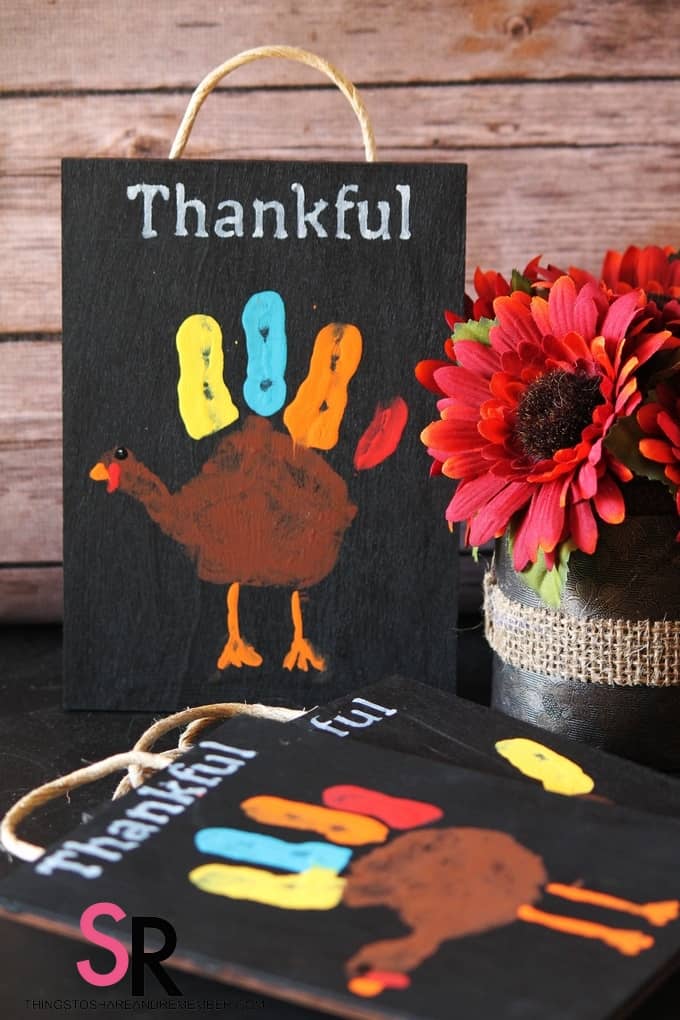
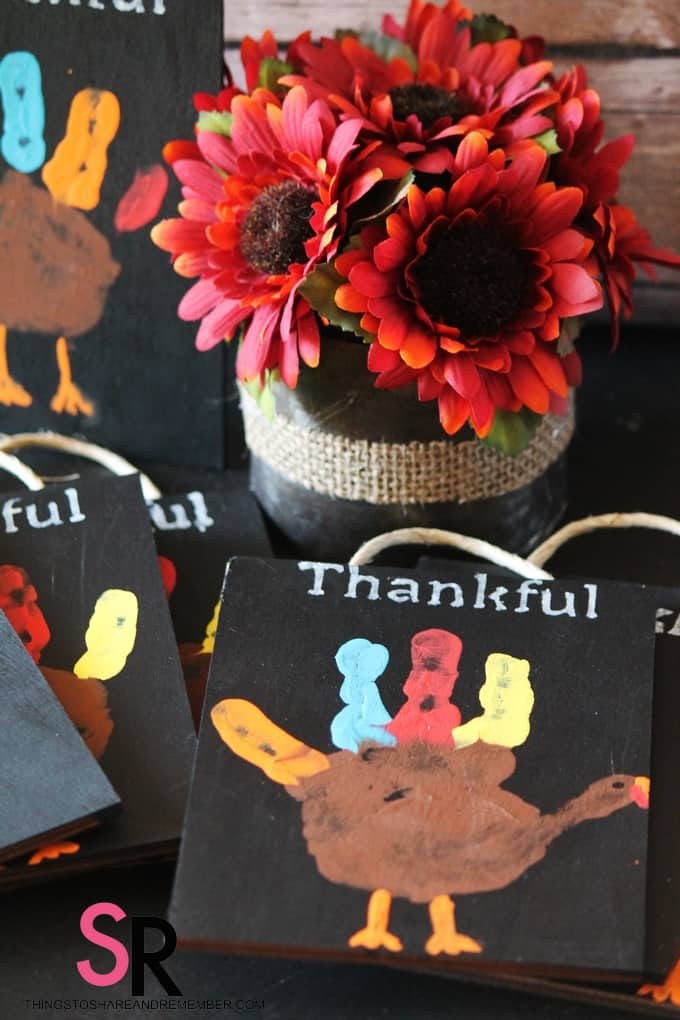
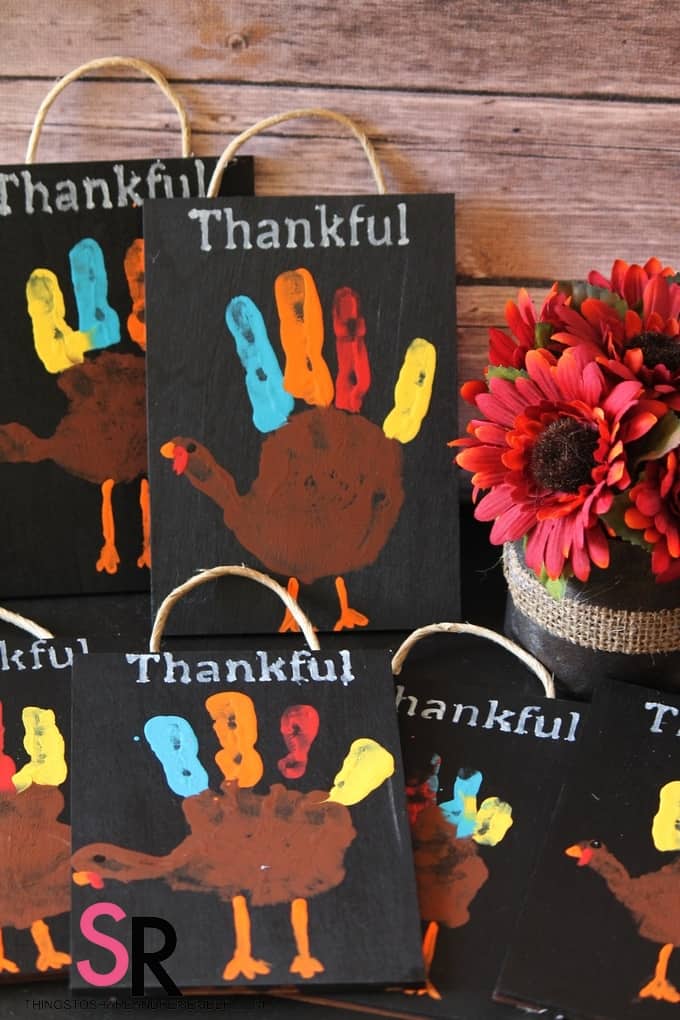
Ta-da! Here’s one of the finished chalkboard thankful turkeys. I used a white Sharpie paint pen for the lettering but you can also use paint.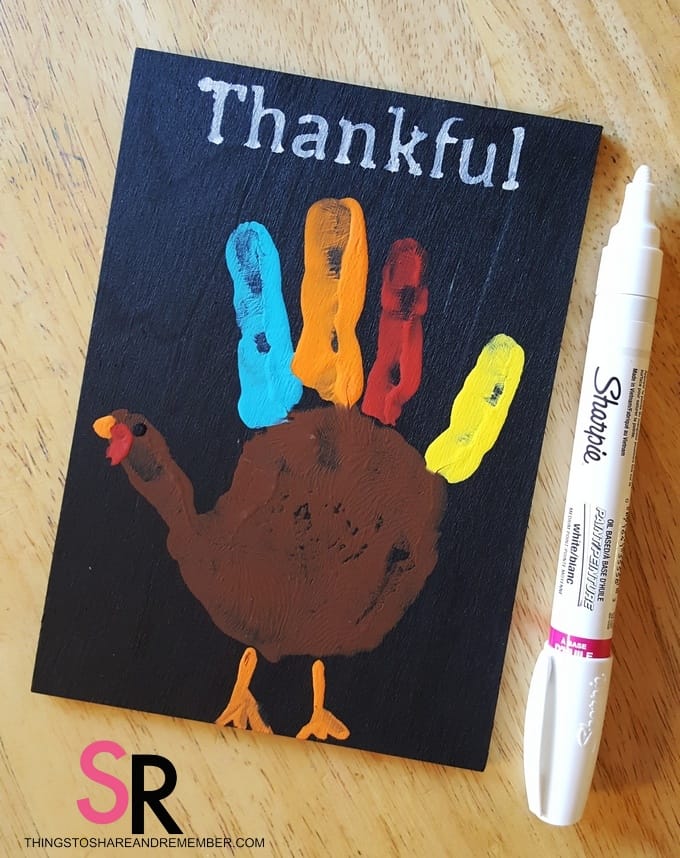

I used a small length of twine hot glued to the back of the board, to make a little hanger. Be sure to write the child’s name and the year on the back for future reference. It will be a family keepsake for sure!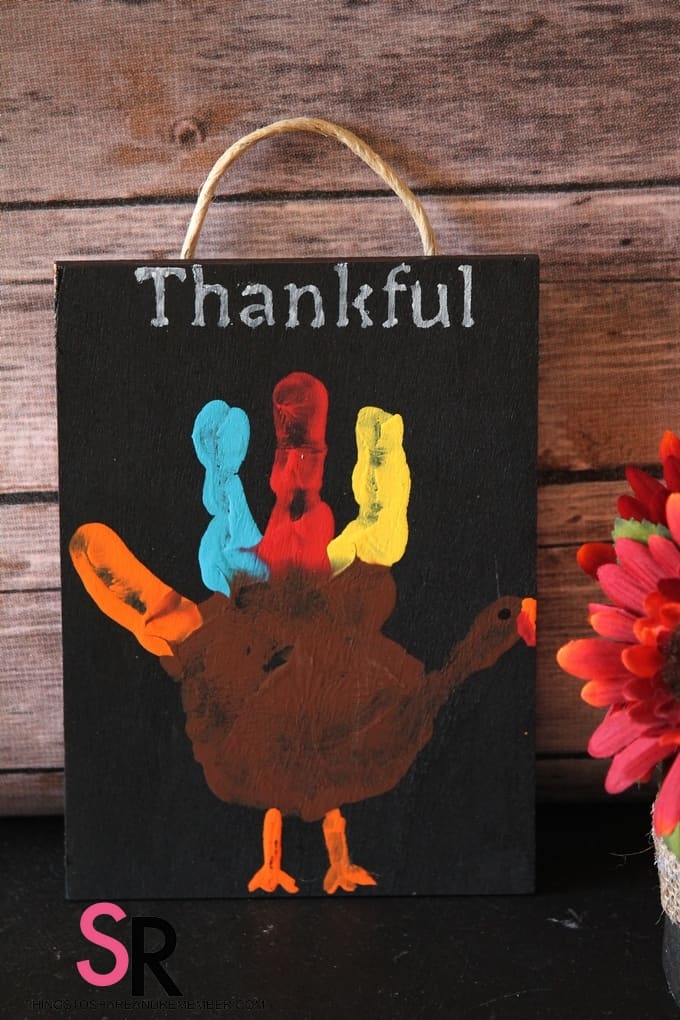

Tips for Making Chalkboard Handprint Turkeys
- Use Washable Paints: Acrylic paints are easy to clean off skin and surfaces but protect clothing to prevent stains.
- Engage the Child: Narrate the process—“Let’s paint the turkey’s feathers blue!”—to keep their interest and make the activity fun.
- Keep It Simple: Don’t worry about perfection! The charm is in the handmade details.
Why You’ll Love This Thanksgiving Craft
- Versatile Decor: Prop it on an easel, hang it on the wall, or use it as a table decoration.
- Thoughtful Gift: Perfect for parents and grandparents who will cherish it for years to come.
- Easy to Make: Minimal prep and quick drying times make this a manageable project for groups or families.
Sweet handmade decor for Thanksgiving that will be forever treasured! Prop it up, hand it on a hook or place it on an easel.

A handprint turkey craft makes a great gift for grandparents!


- The Craft Smart matte acrylic paint set comes with 12 paints, each 2 fl. oz. in size, and features bold and vibrant colors that allow for beautiful self-expression on any canvas.

- 【Value Pack】This bulk set of 5″X7″ canvas boards includes 12 panels for you to create on.
Last update on 2026-05-15 / Affiliate links / Images from Amazon Product Advertising API

This Chalkboard Thankful Handprint Turkey craft will become a treasured family tradition. Gather your materials, involve your little ones, and enjoy the creative process together. Happy crafting!

More Thanksgiving Activities for Kids
- Free Thanksgiving Coloring Pages for Toddlers & Preschoolers
- I Am Thankful for Thanksgiving Printable
- Thanksgiving Handprint Craft Printable
Kids Books to Read at Thanksgiving Time


Last update on 2026-05-16 / Affiliate links / Images from Amazon Product Advertising API