I take photos of my daycare group (individually) each year and frame them as a gift to their parents. Alongside these frames, we create ornaments and send home many crafts throughout December. We added a special touch this year—each child decorated their Christmas Button frames. Every frame turned out unique and meaningful!

Materials and Preparation for Christmas Button Frames Craft
Materials Needed
- Bare wood frames (from Michael’s, $1 each)
- White tempera paint
- Paintbrushes
- Red, green, and silver paint
- Iridescent glitter
- Assorted buttons (red, green, and white)
- Tacky glue (recommended over Elmer’s glue)
- Q-Tips and small paper plates for glue application
No products found.
Preparation Steps
Organizing the Buttons: I sorted the buttons into small bowls for easy access and placed a small puddle of Tacky glue on paper plates for each child to use with a Q-Tip.
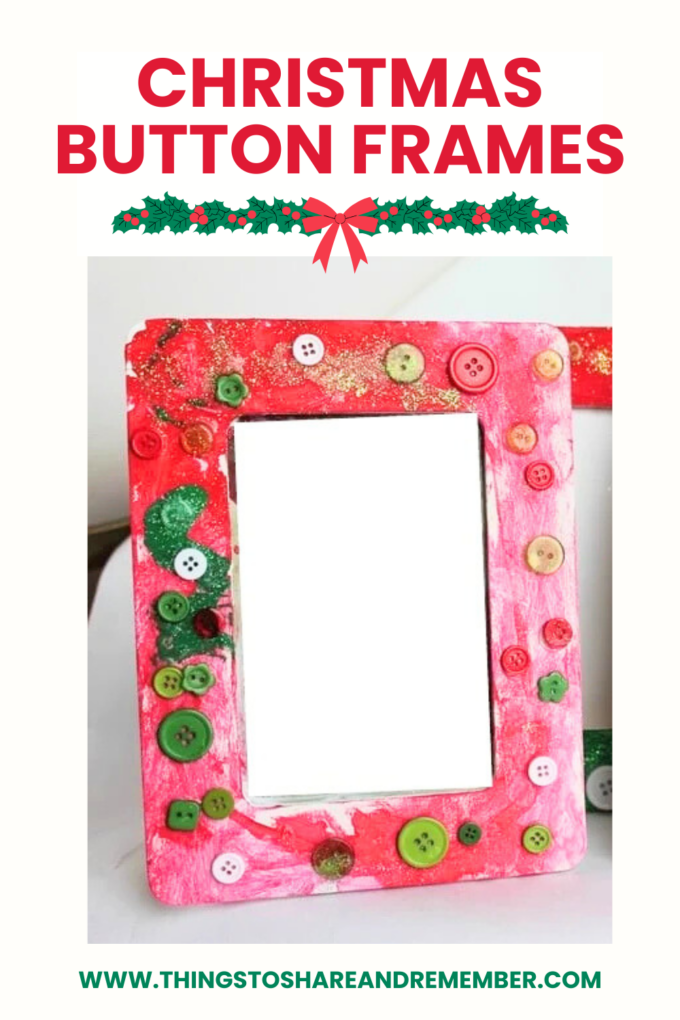
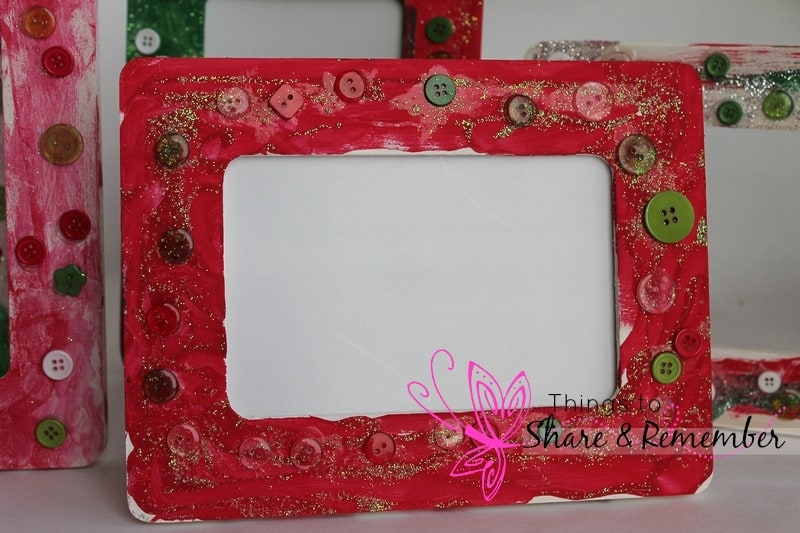
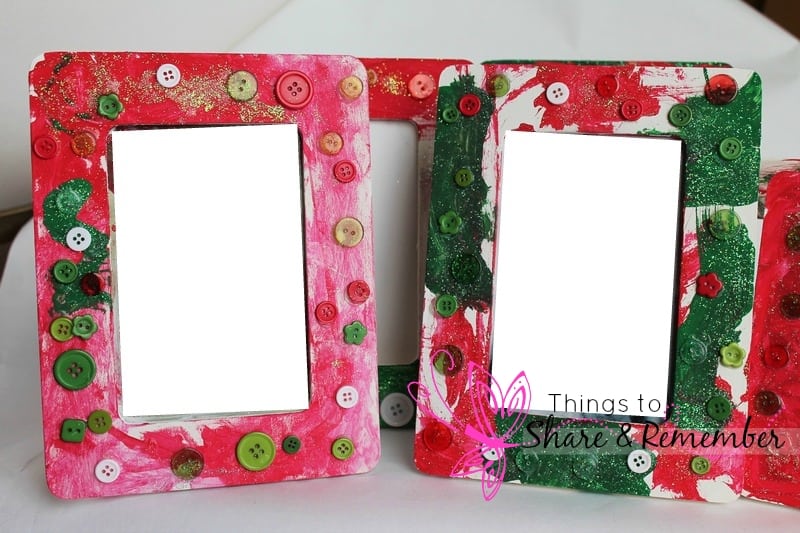
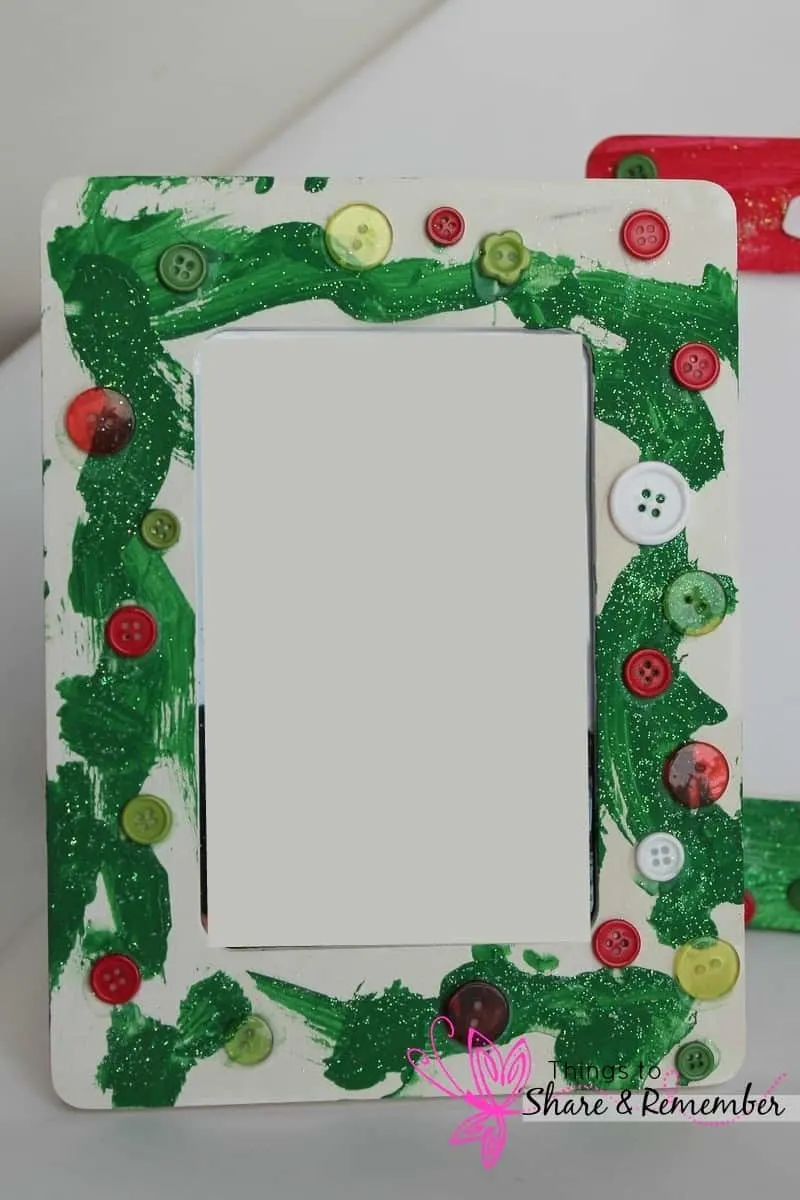
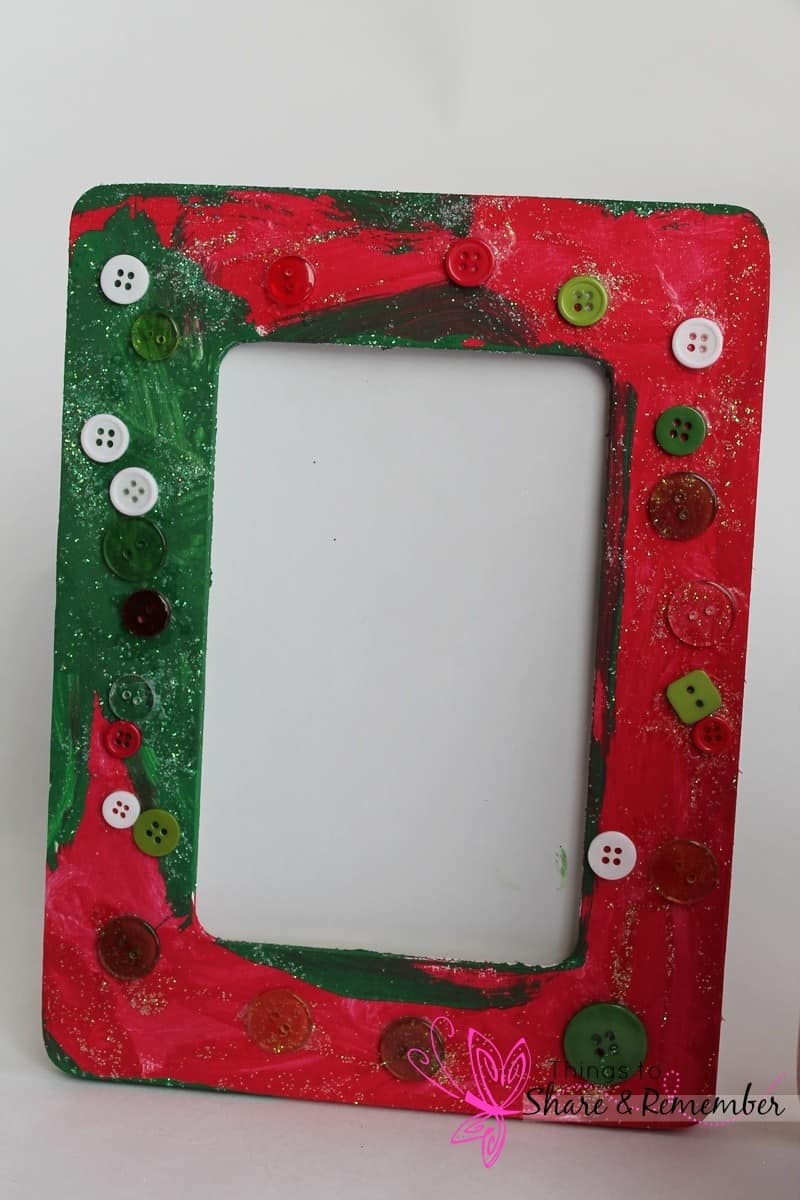
Pre-painting the Frames: Before decorating, I pre-painted the wood frames white using tempera paint. This created a clean and bright base. White paint ensures that any missed spots look polished, not unfinished wood.
Setting up the Creative Space: I provided red, green, and silver paints with separate brushes for each color. Younger children may find working with just one color plus silver easier to keep things simple and avoid mixing colors.
Decorating the Frames
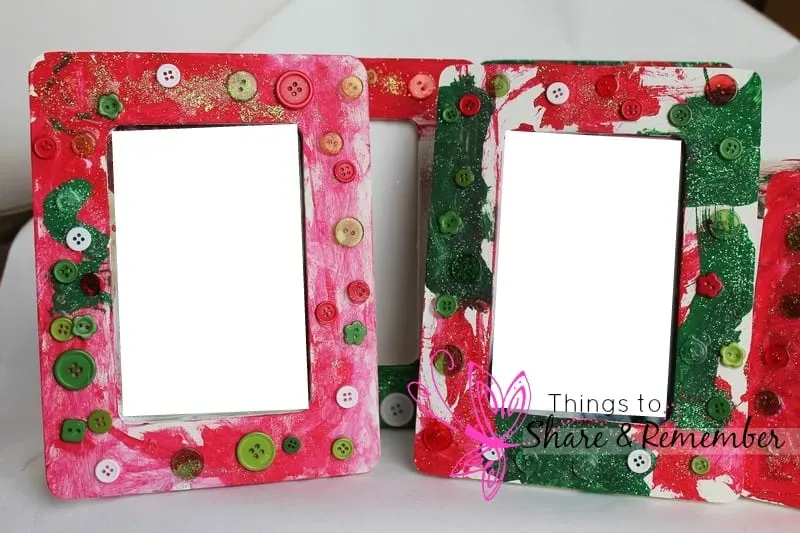
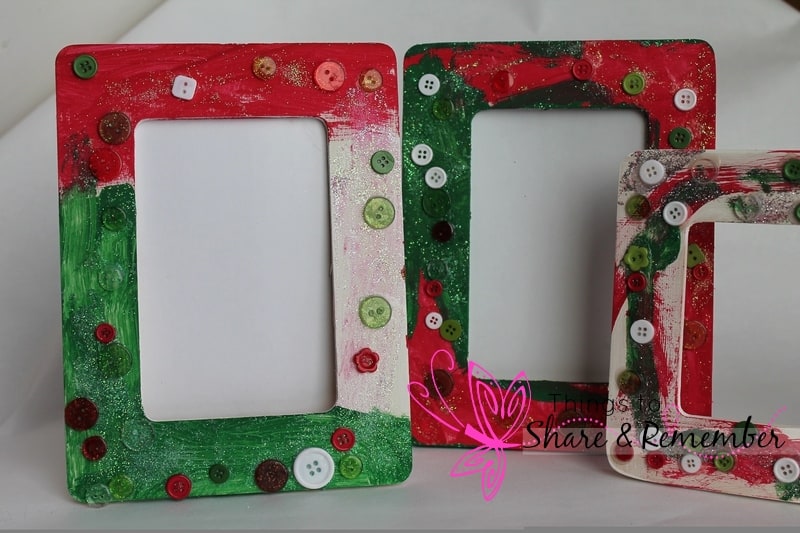
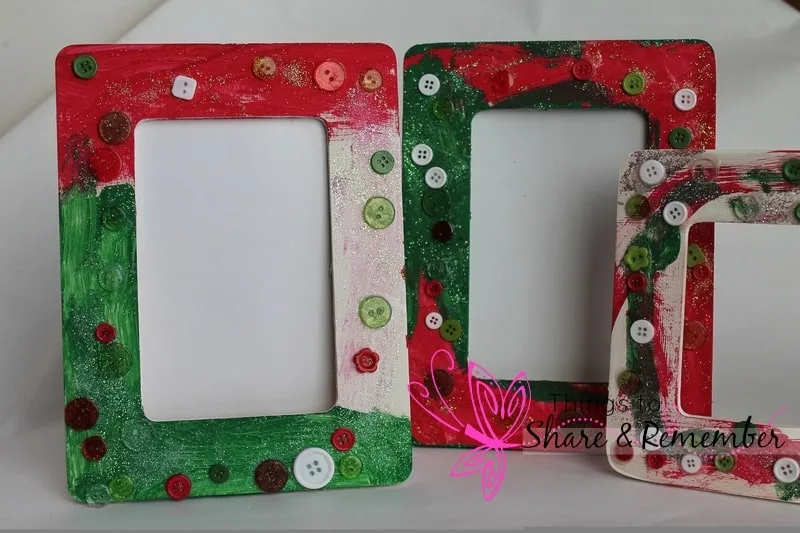
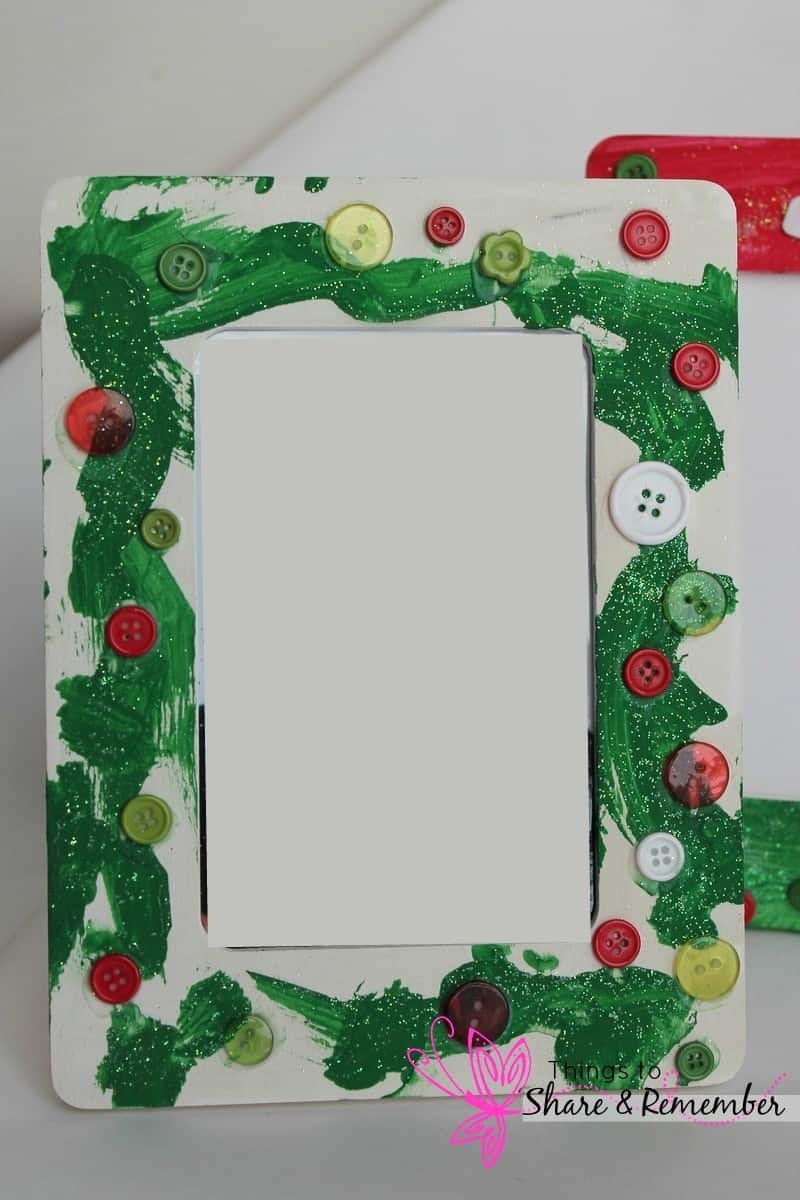
Painting the Frames
Each child painted their frame with the provided colors. I encouraged them to use one color at a time to prevent mixing and achieve vibrant results. After painting, they sprinkled iridescent glitter onto the wet paint, adding a touch of sparkle without altering the paint colors.


Adding Buttons
Once the paint dried, the children glued on various red, green, and white buttons. The Tacky glue worked perfectly to ensure the buttons stayed securely attached. For younger kids, I applied small dabs of glue directly onto the frames, allowing them to focus on placing the buttons.
The Final Product
The finished Christmas Button Frames were stunning! Each child’s personality shone through their creation, making these gifts special. Though I can’t share photos for privacy reasons, I can assure you they were adorable! The children were so proud of their work, and I love them!
Why Christmas Button Frames Are a Great Project
- Simple and Affordable: This project is budget-friendly at just $1 per frame and a few craft supplies.
- Creative and Personal: Each child’s individuality is reflected in their design.
- Keepsake Value: Parents cherish these handmade gifts, which capture a moment.

Get creative this holiday season with these fun and easy crafts. Happy crafting!
More Gifts Kids Can Make
If you enjoyed this craft, here are more ideas for handmade gifts:
- Handprint Calendars: My most popular holiday project for kids.
- Framed Holiday Portraits: Want another photo idea?
- Sled Craft Ornament: A fun and festive decoration.
- Recycled Can Lid Snowman Ornament: An eco-friendly and creative option.
- Holiday Photo Wreaths: Combine photos and festive decorations for a beautiful keepsake.
- Button Tree Ornaments: Make a coordinating ornament.
- Painted Salt Dough Ornaments: A classic holiday craft.
- Tree Photo Ornaments: Combine family memories with holiday cheer.
Cookie Cutter Stamped Wrapping Paper
Sunday 8th of November 2015
[…] wrapping paper was used to wrap the parent gifts: Christmas Button Frames & Sled Craft […]